The BLACK+DECKER CM0915BKD-F, CM2046, CM1060, and CM1160 models offer convenient, programmable brewing, ensuring a perfect, flavorful coffee experience every morning.
Model Overview (CM0915BKD-F, CM2046, CM1060, CM1160)
The BLACK+DECKER 12-Cup Programmable Coffee Maker is available in several models, including CM0915BKD-F, CM2046, CM1060, and CM1160. These models share core functionality – programmable brewing and a 12-cup capacity – but may have slight variations in design or specific features.
Each model aims to deliver a consistently delicious pot of coffee. The CM2046 features a thermal carafe for extended heat retention. The instruction manual is crucial for understanding the nuances of each model, ensuring optimal performance and longevity. These coffee makers are designed for ease of use and reliable operation.
Key Features and Benefits
The BLACK+DECKER 12-Cup Programmable Coffee Maker boasts several key features. Programmability allows users to set brew times in advance, waking up to freshly brewed coffee. The large 12-cup capacity is ideal for families or entertaining.
A sneak-a-cup feature lets you pour a cup mid-brew, while the automatic shut-off provides safety and peace of mind. The manual highlights these benefits, emphasizing ease of use and consistent results. Thermal carafes (in some models) maintain coffee temperature for hours, enhancing the overall experience.

Setting Up Your Coffee Maker
Before first use, carefully review the BLACK+DECKER manual for proper setup, ensuring optimal performance and longevity of your new 12-cup programmable coffee maker.
Initial Cleaning Before First Use
To ensure the freshest tasting coffee and remove any potential manufacturing residue, a thorough cleaning is essential before the initial brew. Begin by washing the carafe, lid, and removable filter basket with warm, soapy water. Rinse these components completely, ensuring no soap remains.
Next, fill the water reservoir to its maximum capacity with fresh, clean water and run a full brewing cycle without adding any coffee grounds. This process effectively cleans the internal components of the coffee maker. After the cycle completes, discard the water and repeat this process one more time. Your BLACK+DECKER coffee maker is now ready for brewing!
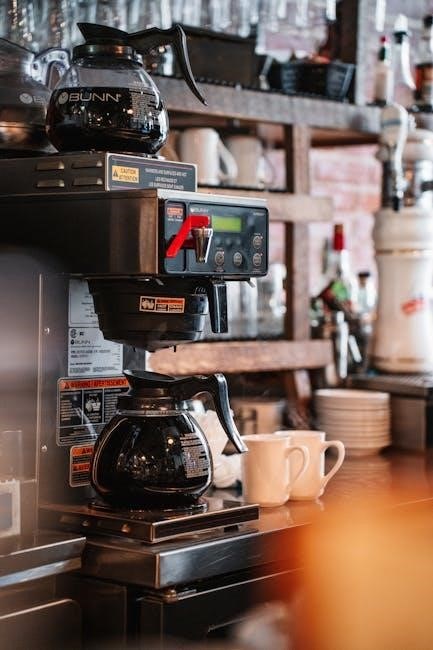
Parts Identification
Familiarizing yourself with the components of your BLACK+DECKER 12-Cup Programmable Coffee Maker is crucial for proper operation and maintenance. Key parts include the Water Reservoir, responsible for holding the brewing water. The Removable Filter Basket securely holds the coffee filter and grounds. The Carafe, typically thermal, keeps brewed coffee warm.
You’ll also find the Control Panel, featuring buttons for programming and operation. The Clock Display shows the current time and programmed settings. Don’t forget the Lid, designed for secure carafe placement, and the Warming Plate, which maintains coffee temperature. Understanding these parts ensures optimal performance.
Brewing Coffee
Achieving a delicious brew is simple! Fill the reservoir with fresh water, add your favorite coffee grounds to the filter, and press brew for enjoyment.
Filling the Water Reservoir
To begin brewing, carefully remove the water reservoir from the coffee maker. Locate the water level indicator markings, clearly displaying cup measurements for accurate filling. Using a clean water source, pour the desired amount of water into the reservoir, ensuring you do not exceed the maximum fill line. A standard cup is approximately 5 ounces, though this can vary based on your preferred brewing strength. Once filled, securely reattach the reservoir to the coffee maker base, confirming it’s properly seated to prevent leaks during the brewing process.
Adding Coffee Grounds
After filling the water reservoir, open the filter basket. Insert a paper filter, ensuring it sits correctly within the basket to prevent grounds from overflowing. Add the desired amount of ground coffee; a general guideline is one tablespoon per cup, adjusting to your preferred strength. For a full 12-cup pot, use approximately 12 tablespoons. Close the filter basket securely. Ensure no grounds are visible around the edges to maintain a clean brewing process and optimal coffee flavor.
Programming the Brew Time
To utilize the auto-brew function, first, ensure the clock is correctly set. Press the “Prog” button; the display will likely flash. Use the “Hour” and “Minute” buttons to set your desired brew start time. Once the correct time is displayed, press “Prog” again to confirm. The indicator light will illuminate, confirming the auto-brew is activated. Ensure coffee grounds and water are added before programming, as the machine will begin brewing automatically at the set time.

Using the Programmable Features
Explore convenient features like the auto-brew function and programmable clock, allowing you to wake up to freshly brewed coffee with ease and precision.
Setting the Clock
Accurate time setting is crucial for utilizing the programmable features of your BLACK+DECKER coffee maker. Begin by pressing the ‘Hour’ button to set the current hour. Use the ‘Minute’ button to adjust the minutes accordingly. Ensure you observe the AM/PM indicator, adjusting as needed for correct time display.
The clock will automatically save your settings, providing a reliable time base for the auto-brew and delay brew functions. Refer to your model’s specific instructions, as button layouts may slightly vary. A properly set clock guarantees your coffee brews precisely when you desire, enhancing your daily routine.
Auto-Brew Function Explained
The Auto-Brew function allows for pre-programmed coffee brewing, delivering a fresh pot automatically. After setting the clock and desired brew time, activate Auto-Brew by pressing the corresponding button. The indicator light will illuminate, confirming the function is engaged.
This feature is ideal for waking up to freshly brewed coffee. Ensure the water reservoir is filled and coffee grounds are in place before activating. The coffee maker will automatically initiate the brewing process at the programmed time, simplifying your morning routine and providing consistent results.
Delay Brew Programming Steps
To utilize the Delay Brew feature, first, ensure the clock is accurately set. Press the “Program” button, then use the “Hour” and “Minute” buttons to set the desired brew start time. Once the correct time is displayed, press “Program” again to confirm.
Next, press the “Auto Brew” button; the indicator light will illuminate. The coffee maker will now automatically begin brewing at the programmed time. Remember to fill the water reservoir and add coffee grounds beforehand for a seamless brewing experience.
Cleaning and Maintenance
Regular cleaning, including descaling and carafe washing, is crucial for optimal performance and longevity of your BLACK+DECKER coffee maker, ensuring fresh brews.
Regular Cleaning Schedule
To maintain peak performance, establish a consistent cleaning routine for your BLACK+DECKER coffee maker. Daily, wash the carafe, lid, and filter basket with warm, soapy water after each use. Weekly, wipe down the exterior of the appliance with a damp cloth. Monthly, a more thorough cleaning is recommended. This includes running a full brewing cycle with just water to help remove mineral buildup.
Remember to unplug the coffee maker before cleaning. Avoid abrasive cleaners, as they can damage the finish. Consistent cleaning prevents residue buildup, ensuring consistently delicious coffee and extending the life of your appliance.
Descaling the Coffee Maker
Over time, mineral deposits can accumulate inside your BLACK+DECKER coffee maker, affecting brewing performance. Descaling removes these deposits. Fill the water reservoir with a mixture of equal parts white vinegar and water. Run a full brewing cycle. Afterwards, run two full cycles with fresh water only to rinse away any vinegar residue.
Repeat this process every 3-6 months, depending on water hardness. Descaling ensures optimal water flow, consistent brewing temperature, and preserves the flavor of your coffee. Always unplug the unit before descaling and ensure proper ventilation.
Carafe and Filter Basket Cleaning
After each use, wash the carafe and filter basket with warm, soapy water. Rinse thoroughly to remove any coffee residue. The carafe is typically dishwasher-safe (top rack recommended), but check your specific model’s manual. For stubborn stains in the carafe, a paste of baking soda and water can be effective.
Ensure the filter basket is completely clean to prevent old coffee grounds from affecting the taste of future brews. Regularly inspect the filter basket for any cracks or damage and replace if necessary. Proper cleaning maintains hygiene and coffee quality.

Troubleshooting Common Issues
Addressing issues like the coffee maker not turning on, weak or strong brews, or error messages is crucial for consistent performance and optimal coffee enjoyment.
Coffee Maker Not Turning On
If your BLACK+DECKER coffee maker fails to power on, first verify the unit is securely plugged into a functioning electrical outlet. Test the outlet with another device to confirm it’s providing power. Ensure the coffee maker’s power switch is fully engaged – sometimes a gentle push is needed.
Check the circuit breaker or fuse box; a tripped breaker or blown fuse could be the culprit. If the problem persists, examine the power cord for any visible damage, such as cuts or fraying. A damaged cord requires replacement. Finally, consult the full instruction manual for specific troubleshooting steps related to your model (CM0915BKD-F, CM2046, CM1060, or CM1160).
Coffee Brewing Too Weak or Too Strong
For weak coffee, increase the amount of coffee grounds used per cup. A general guideline is one to two tablespoons per 5oz cup, but adjust to your preference. Ensure you’re using fresh, properly ground coffee beans. If the coffee is too strong, reduce the amount of grounds.
Experiment with different coffee-to-water ratios to find your ideal strength. Also, consider the type of coffee bean – some varieties are naturally bolder. Refer to your BLACK+DECKER CM0915BKD-F, CM2046, CM1060, or CM1160 manual for specific recommendations and brewing tips.
Error Messages and Solutions
While specific error codes vary by model (CM0915BKD-F, CM2046, CM1060, CM1160), a common issue is a “Clean” indicator. This signals the need for descaling to remove mineral buildup. Refer to the “Descaling the Coffee Maker” section in your manual for detailed instructions.
If the coffee maker fails to power on, check the power cord and outlet. Ensure the carafe is properly positioned. Consult your BLACK+DECKER manual for troubleshooting specific error displays. If problems persist, contact BLACK+DECKER customer support for assistance.

Safety Precautions
Always unplug the coffee maker before cleaning; Avoid immersing the base in water. Keep the cord away from hot surfaces to prevent electrical hazards.

Important Safety Instructions
To reduce the risk of fire, electric shock, or injury, carefully read all instructions before operating the BLACK+DECKER coffee maker. Ensure the voltage of your outlet matches the appliance’s specifications. Never operate the appliance with a damaged cord or plug. Avoid using extension cords.
Do not immerse the base, cord, or plug in water or other liquids. Close supervision is necessary when the appliance is used near children. Allow the appliance to cool completely before cleaning. Always unplug from the outlet when not in use and before cleaning. Use caution when handling hot surfaces.
Electrical Safety Guidelines
To prevent electrical hazards, always operate the BLACK+DECKER coffee maker on a properly grounded outlet. Never operate the appliance if the power cord or plug is damaged. Do not attempt to repair the appliance yourself; contact qualified service personnel for assistance. Avoid running the cord under carpeting or near heat sources.
Ensure the coffee maker is unplugged before cleaning or performing maintenance. Do not use the appliance outdoors or in damp environments. Keep the appliance away from flammable materials. If the appliance malfunctions, immediately unplug it and discontinue use. Always grasp the plug, not the cord, when disconnecting.

Warranty Information
The BLACK+DECKER coffee maker is covered by a limited warranty against defects in materials and workmanship, details available upon registration.
Warranty Coverage Details
The BLACK+DECKER 12-Cup Programmable Coffee Maker warranty typically covers defects in materials and workmanship for a specified period from the date of original purchase. This coverage generally includes malfunctions occurring during normal household use. It does not cover damage resulting from misuse, accidents, alterations, or commercial use.
The warranty often requires proof of purchase. Damage caused by improper cleaning, descaling solutions not recommended by BLACK+DECKER, or unauthorized repairs will void the warranty. To understand the exact terms, duration, and limitations, carefully review the warranty documentation included with your specific model (CM0915BKD-F, CM2046, CM1060, or CM1160).
How to Claim Warranty
To initiate a warranty claim for your BLACK+DECKER 12-Cup Programmable Coffee Maker (CM0915BKD-F, CM2046, CM1060, CM1160), first gather your original proof of purchase and the model number. Contact BLACK+DECKER’s customer service department – details are usually found in the product manual or on their official website.
You may be required to troubleshoot the issue with a representative. If a repair or replacement is approved, you’ll likely need to ship the coffee maker to an authorized service center, potentially at your expense. Retain all shipping documentation and follow their instructions carefully to ensure a smooth claim process.