Trophy Ridge Sight Light Instructions: A Comprehensive Guide (Updated 03/31/2026)
Demand for Trophy Ridge’s fiber-optic bow sights is exceptionally high, with the year-old company struggling to meet current production needs and consumer requests.
Trophy Ridge has quickly become a leading innovator in the archery world, specializing in high-quality sights designed to enhance accuracy and visibility for bowhunters and competitive archers alike. Their commitment to producing fiber-optic sights has resonated with a growing customer base, evidenced by the current high demand.
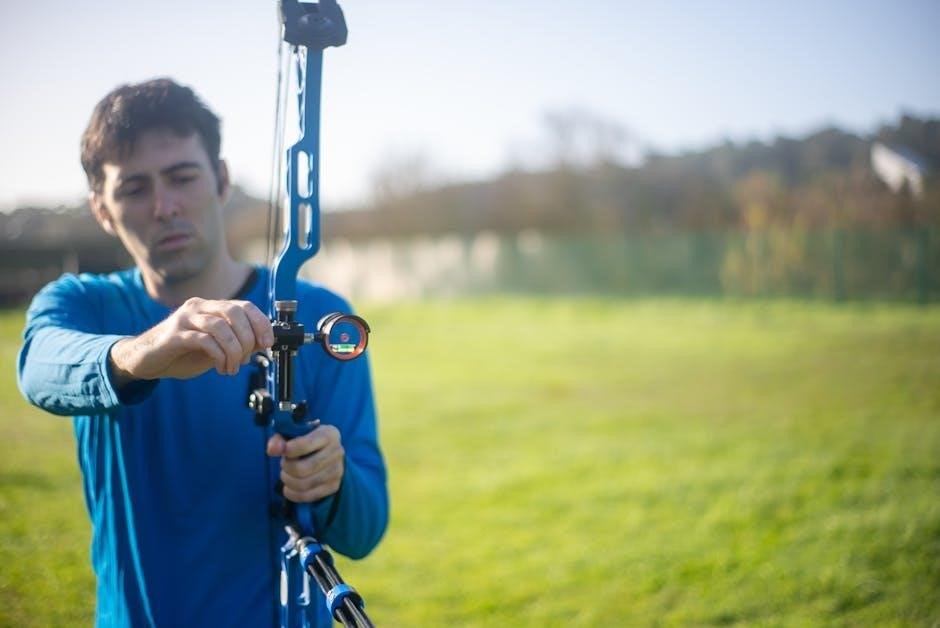
These sights aren’t merely aiming devices; they represent a dedication to improving the shooting experience. The recent surge in popularity, as reported today (03/31/2026), highlights the brand’s success. Adding illumination to these sights takes performance to the next level, particularly in low-light conditions, offering a distinct advantage to the shooter. This guide will detail everything you need to know about Trophy Ridge sight lights.
Understanding the Benefits of Illuminated Sights
Illuminated sights, like those offered by Trophy Ridge, dramatically improve target acquisition and accuracy, especially during dawn, dusk, or in heavily shaded environments. The added visibility provided by a lit pin significantly reduces eye strain and allows for faster, more confident aiming.
This is crucial for hunters facing challenging lighting conditions. The current high demand for Trophy Ridge sights (reported 03/31/2026) suggests archers recognize these advantages. A brightly lit pin creates a clearer sight picture, minimizing errors and maximizing the chance of a successful, ethical shot. Ultimately, illuminated sights enhance overall shooting performance and confidence.
Types of Trophy Ridge Sight Lights
Trophy Ridge offers illuminated sights across several popular series, catering to diverse archery styles and budgets. Currently, the React Pro, Hitman, and Whisper Creek series feature models equipped with integrated sight lights. Each series balances features, durability, and price point.
The company, experiencing high demand as of 03/31/2026, focuses on fiber-optic technology. React Pro sights prioritize adjustability, Hitman sights emphasize ruggedness, and Whisper Creek sights offer a streamlined, lightweight design. Choosing the right series depends on individual preferences and intended use, ensuring optimal performance in various hunting or target shooting scenarios.
React Pro Series Sight Lights
The React Pro series from Trophy Ridge is designed for archers demanding ultimate adjustability. These sights, currently in high demand (as of 03/31/2026), feature a micro-drive lock system for precise windage and elevation adjustments.
When equipped with a sight light, the React Pro enhances visibility in low-light conditions, crucial for extended hunts. The series’ robust construction ensures durability, while the integrated light module provides consistent illumination. Archers appreciate the React Pro’s ability to quickly adapt to changing distances and environments, making it a versatile choice for serious competitors and hunters alike.
Hitman Series Sight Lights
Trophy Ridge’s Hitman series sights are known for their simplicity and accuracy, currently experiencing high demand alongside other models (as of 03/31/2026). These sights offer a streamlined profile and easy-to-use adjustments, making them ideal for hunters prioritizing quick target acquisition.
Adding a sight light to the Hitman series dramatically improves visibility during dawn and dusk hunts. The light module integrates seamlessly, providing focused illumination without obstructing the sight picture. Archers value the Hitman’s reliable performance and the enhanced confidence a lighted sight provides in challenging lighting conditions, contributing to its popularity.
Whisper Creek Series Sight Lights
The Whisper Creek series from Trophy Ridge focuses on minimizing sight obstruction and maximizing field of view, a feature highly sought after by serious bowhunters – a market currently experiencing significant demand (03/31/2026). These sights are designed for a clean, uncluttered look, enhancing focus on the target.
Integrating a sight light with the Whisper Creek series offers a subtle yet effective illumination solution. The light module is engineered to complement the sight’s low-profile design, maintaining its streamlined aesthetic. Hunters appreciate the increased visibility without compromising the sight’s core benefits of clarity and minimal obstruction.
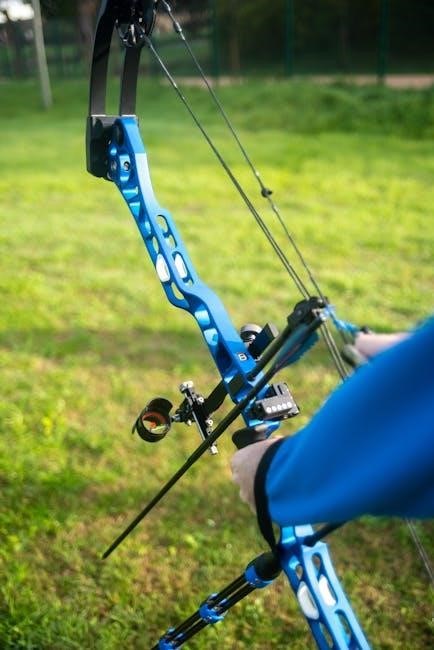
Components of a Trophy Ridge Sight Light System
A typical Trophy Ridge sight light system comprises three key components: the light module itself, a rheostat or control switch for brightness adjustment, and a battery compartment to power the system. These elements work in harmony to provide reliable illumination for enhanced visibility in low-light hunting conditions.

Given the high demand for Trophy Ridge products (as of 03/31/2026), understanding these components is crucial for installation and maintenance. Each part is designed for durability and ease of use, ensuring hunters can quickly adapt to changing light levels and maintain focus on their target.
Light Module
The light module is the core of the Trophy Ridge sight light system, responsible for emitting the visible light that aids in aiming. Constructed with durable materials to withstand outdoor conditions, it’s designed for consistent performance. As Trophy Ridge experiences high demand (03/31/2026), the quality of this module is paramount.
Typically, the module utilizes fiber-optic technology, channeling light to the pins for enhanced visibility. Its compact size ensures minimal interference with the bow’s balance and the archer’s sight picture. Proper attachment and wiring are essential for optimal function, aligning with Trophy Ridge’s commitment to quality.
Rheostat/Control Switch
The rheostat, or control switch, is crucial for managing the brightness of the Trophy Ridge sight light. This component allows archers to adjust the illumination level to suit varying lighting conditions, ensuring optimal visibility without glare. Given Trophy Ridge’s current high demand (03/31/2026), reliable functionality is key.
Typically located conveniently near the sight, the switch enables easy, one-handed operation. It often features multiple brightness settings, ranging from low for dusk to high for bright daylight. A robust design ensures durability and consistent performance, contributing to a precise and enjoyable shooting experience.
Battery Compartment & Battery Type
The battery compartment on Trophy Ridge sight lights is designed for easy access and secure battery retention. Considering the company’s production challenges (as of 03/31/2026), ensuring user-friendly maintenance is vital. Most models utilize readily available battery types, commonly CR2032 button cell batteries, though specific requirements vary by series.
The compartment is typically sealed to offer some protection against moisture, enhancing the longevity of the battery and the light’s performance. Always double-check the polarity markings within the compartment before inserting batteries to prevent damage and ensure proper operation.
Installing the Sight Light – Step-by-Step
Given Trophy Ridge’s high demand (03/31/2026), a smooth installation process is crucial for customer satisfaction. Begin by carefully unpacking all components and verifying their presence. First, attach the light module to the designated mounting point on your Trophy Ridge sight – this usually involves a secure snap-fit or screw mechanism.
Next, connect the wiring harness, ensuring a firm and reliable connection. Avoid excessive force. Finally, proceed to battery installation (detailed in the next section) to power up the system. Double-check all connections before use.
Attaching the Light Module to the Sight
Considering Trophy Ridge’s current production challenges (03/31/2026), a secure attachment is paramount. Locate the designated mounting point on your specific Trophy Ridge sight model – consult your sight’s manual if needed. Most models feature a snap-fit design, requiring firm but gentle pressure until you hear a click.
Alternatively, some models utilize a small screw to secure the module. Ensure the screw is tightened adequately, but avoid over-tightening, which could damage the sight or module. Verify the module is firmly attached and doesn’t wobble before proceeding.
Connecting the Wiring
Given Trophy Ridge’s high demand (03/31/2026), careful wiring is crucial for a functional sight. Locate the wiring port on both the light module and the sight body. Gently insert the connector, ensuring proper alignment – forcing it can cause damage.
A secure connection is vital; a loose connection will result in intermittent or no illumination. Some models feature a locking mechanism; engage it once connected. Inspect the wiring for any kinks or damage before and after connection. If issues arise, double-check the alignment and connection points.
Powering the Sight Light – Battery Installation
Considering Trophy Ridge’s production challenges (03/31/2026), proper battery installation is key to reliable performance. Locate the battery compartment, typically on the light module or a connected housing. Open the compartment, noting the polarity markings (+ and -) inside.
Insert the correct battery type (refer to the ‘Battery Type’ section) ensuring correct orientation. Securely close the battery compartment, verifying a snug fit to maintain contact. A loose compartment can interrupt power. Test the sight light immediately after installation to confirm functionality and proper connection.
Battery Type and Polarity
Given Trophy Ridge’s high demand (03/31/2026), ensuring you have the correct battery is crucial to avoid delays. Most Trophy Ridge sight lights utilize standard coin cell batteries, commonly CR2032. Always verify the specific battery type listed on the light module or in your product manual.
Polarity is critical! Incorrect battery insertion will prevent the light from functioning. The battery compartment will clearly indicate the positive (+) and negative (-) terminals. Match the battery’s polarity to these markings during installation. Double-check before closing the compartment.

Replacing Batteries
Considering Trophy Ridge’s current production challenges (03/31/2026), proactively maintaining your sight light is wise. When the light dims significantly, it’s time for a battery change. Begin by carefully accessing the battery compartment, usually located on the light module itself.
Remove the old battery, noting its orientation for correct polarity during re-installation. Insert the new CR2032 (or specified type) ensuring the positive and negative terminals align with the compartment markings. Securely close the compartment. Test the light to confirm proper function.
Operating the Sight Light – Using the Rheostat
Given Trophy Ridge’s high demand (03/31/2026), maximizing your existing sight light’s functionality is key. The rheostat, or control switch, allows precise brightness adjustment. Locate the rheostat, typically a dial or button on the light module or connecting wire.
Turning the dial or pressing the button cycles through various brightness levels, from off to maximum illumination. Experiment to find the optimal setting for your hunting environment. Lower settings conserve battery life, while brighter settings enhance visibility in low-light conditions. Remember to turn the light off when not in use.
Adjusting Brightness Levels
Considering Trophy Ridge’s production challenges (03/31/2026), efficient use of your sight light is crucial. Brightness adjustment is achieved via the rheostat, offering a spectrum of illumination. Start with the lowest setting and gradually increase it until the pin is clearly visible against various backgrounds.
Different hunting conditions demand different levels. Bright sunlight requires minimal illumination, while dusk or dawn necessitates a brighter setting. Regularly adjust the brightness to optimize visibility and conserve battery power. Experimentation is key to finding the perfect level for your specific needs and environment.

On/Off Functionality
Given Trophy Ridge’s high demand (03/31/2026), maximizing battery life is essential. The sight light’s on/off function is integrated with the rheostat control switch. Typically, rotating the rheostat fully in one direction will activate the light, while rotating it to the opposite extreme will switch it off.
Ensure the switch is firmly positioned for reliable operation. A partially engaged switch can lead to intermittent illumination or unnecessary battery drain. Always confirm the light is completely off when not in use, especially during transport or storage, to preserve power and extend battery longevity.
Troubleshooting Common Issues
Considering Trophy Ridge’s production challenges (03/31/2026), ensuring proper function is key. If the sight light fails to operate, first verify battery installation and polarity. A dim or flickering light often indicates low battery power, requiring immediate replacement. Check wiring connections for looseness or corrosion, as these can interrupt the electrical circuit.
If issues persist, consult the Trophy Ridge resources (see section below). Remember, the company is experiencing high demand, so patience may be required when seeking support. Documenting the problem and sight model number will expedite assistance.
Light Not Turning On
Given Trophy Ridge’s current high demand (03/31/2026), a non-illuminating sight light is frustrating but often easily resolved. Begin by confirming the rheostat is switched to the ‘on’ position and isn’t set to the lowest brightness level. Next, meticulously check the battery compartment for correct battery installation, ensuring proper polarity – positive and negative terminals aligned correctly.
If the battery is new and correctly installed, inspect the wiring connecting the light module to the sight. Look for any disconnections or damage. A faulty connection prevents power flow; If problems continue, contact Trophy Ridge support.
Dim or Flickering Light
Considering Trophy Ridge’s production challenges (03/31/2026), a dim or flickering sight light suggests a weakening power source. The most common cause is a low battery. Replace the battery with a fresh one of the correct type, verifying correct polarity during installation. If a new battery doesn’t resolve the issue, examine the wiring connections between the light module and the sight body.
Loose or corroded connections can interrupt the electrical current, causing inconsistent illumination. Ensure all connections are secure and clean. If the problem persists, reach out to Trophy Ridge’s customer support for further assistance.
Maintaining Your Trophy Ridge Sight Light
Given Trophy Ridge’s high demand (03/31/2026), protecting your investment is crucial. Regularly clean the light module with a soft, dry cloth to remove dust and debris that can diminish brightness. Avoid abrasive cleaners or solvents. Inspect the wiring for any signs of damage, such as fraying or cracking, and address them promptly.
Protecting the sight light from moisture is essential. While designed for outdoor use, prolonged exposure to rain or humidity can cause corrosion. Store your bow in a dry location when not in use, and consider a protective cover during inclement weather.
Cleaning the Light Module

As Trophy Ridge experiences high demand (03/31/2026), maintaining optimal light module performance is key. Begin by disconnecting the power source – remove the batteries. Use a soft, dry microfiber cloth to gently wipe away dust, dirt, and fingerprints from the light’s surface. Avoid applying excessive pressure.
For stubborn debris, lightly dampen the cloth with distilled water, ensuring no moisture enters the module’s internal components. Never use harsh chemicals, solvents, or abrasive cleaners, as these can damage the lens or housing. Regularly cleaning ensures maximum brightness and visibility.
Protecting from Moisture
Given Trophy Ridge’s current high production volume (03/31/2026), ensuring longevity is vital. Moisture can severely damage the sight light’s electrical components. After cleaning, thoroughly dry the light module before reattaching it to your bow sight. When not in use, store the bow and sight in a dry, climate-controlled environment.
Consider using a waterproof bow case during transport and hunting, especially in inclement weather. Avoid prolonged exposure to rain, snow, or humidity. Inspect the seals around the battery compartment regularly for any signs of damage or wear, replacing them if necessary to maintain a watertight barrier.
Safety Precautions When Using Sight Lights
As Trophy Ridge experiences high demand (03/31/2026), responsible use is paramount. Never disassemble the sight light module beyond battery replacement; internal components pose a risk. Always power off the sight light when not actively in use to conserve battery life and prevent accidental activation.
Be mindful of the light’s brightness, especially in low-light conditions, to avoid temporary vision impairment for yourself or others. Do not stare directly into the light source. Regularly inspect wiring for damage, and discontinue use if any fraying or exposure is detected. Prioritize safe handling and storage.
Resources and Support – Trophy Ridge Contact Information
Given Trophy Ridge’s current high demand (as of 03/31/2026), accessing support may require patience. For general inquiries and assistance with your sight light, visit their official website. Direct contact can be made via phone during business hours; check the website for the most current number.
Email support is also available, though response times may be extended due to increased volume. Explore the FAQ section on the website for answers to common questions. Social media channels offer another avenue for updates and community support, but are not ideal for technical issues.